Tuesday, July 6, 2021

Page 9 - My Favorite Connect-the-Dots Site!


Greetings, it's me, Alberto, but you can call me the Makerspace Guy!

CONNECT-THE-DOTS
(also known as "Dot to Dot" or "Join the Dots")

Several years ago, I encouraged my school to start celebrating International Dot Day every September.  ---  Click on the link to read information on the special, worldwide event: International Dot Day.


As part of the celebration, I decided to add connect-the-dots worksheets to our Makerspace Stations.  I searched online for a site that offered kid-friendly, yet interesting, free-to-print pages.  Every teacher loves free resources, but sadly, most sites come with some kind of catch and aren't free at all.

However, I found a connect-the-dots site that is totally legit: CONNECT THE DOTS 101.  Plus, it features high-quality images of licensed characters, animals, and fun holiday dot-to-dot pages.


After our first Dot Day, I continued to use CONNECT THE DOTS 101 for all my Kinder through 5th-grade classes.  Why?  Well, here are my Top 5 reasons:
  • Just because students can count successfully (orally), does not always guarantee they can sequence successfully (visually).  These sheets are good practice.
  • The pages have turned out to be great gateways to further creativity for the kids.
  • Usually, the worksheets are completed, colored, and cut out to be added to other more complex Maker projects.
  • I found that the pictures are wonderful for kids who don't like to draw but need a nice picture for a project.  ---  I see this especially with 5th-grade boys who want to make something to give to a parent for a special occasion.
  • As for students who do enjoy drawing, I've seen many using the images of animals and flowers to practice honing their illustrating talents.


Let's check out some of the images available on CONNECT-THE-DOTS 101:

A merry, mass array of holiday worksheets...


A magnificent menagerie of animals pages...


A glorious garden of beautiful flower images...


Plus, I appreciate the wonderful world of diversity the site offers.


All this and so much more!


Now, here are some helpful tips, hacks, and bright ideas to begin a Connect-the-Dots Station in your own classroom 😁:


TIPS


A few years back, I attended a presentation hosted by the Google corporation.  The speaker shared that she and her entire staff use Google Slides, not just for slide presentations, but for designing worksheets, fliers, and posters.  Turns out it's so much easier than using Google Docs!  ---  BTW, the slides can be saved as JPEG images and PDF files.  

Now I use Google Slides to create all my Makerspace worksheets, including connect-the-dots.  It's simple to add images and text to the pages, plus makes centering, cropping, and editing much quicker!

IMPORTANT NOTE:  Make sure to first set the slide dimensions to the standard paper size of 8 1/2" x 11", in either Portrait or Landscape mode.  ---  Also, for any slides meant as worksheets I add the title "CUSTOM" when naming the pages.


HACKS

"Cat Mom": (l.) Screenshot of ready to print, unformatted picture,
(r.) copy of worksheet formatted using Google Slides.

MAKE THE IMAGE SMALLER ---  Download the image, or copy and paste it, onto Google Slides (or a Word document).  Format the picture so it won't take up the entire  8 1/2" x 11" page.  This leaves room for students to add artwork or a personal message to the sheet.  It also makes the illustration easier to color since it won't be so large.
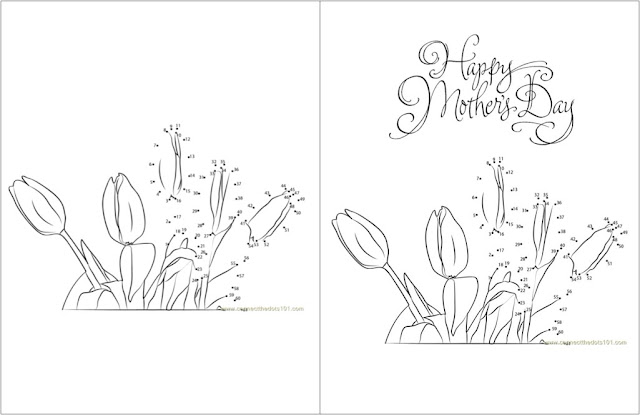

"Tulip Flower": (l.) Formated only, (r.) formated with text added.

ADD TEXT TO THE WORKSHEET ---  Include a clipart greeting to an existing design for special occasions!  ---  Once I added text to the tulips, the page finally became a popular item for Mother's Day.


BRIGHT IDEAS

  • Print different hot air balloon worksheets from CONNECT THE DOTS 101.  Decorate them with fun colors, then use materials and tools to create a whimsical mobile to hang in the classroom or at home!

  • Use various flower worksheets to construct a free-standing, 3D garden.  Identify each plant with little signs.

  • Create a poster using copies of connect-the-dots roses.  Color the flowers and make a guide explaining the meaning of the colors.  Have students visit the FTD Florist site for more information on which color rose depicts feelings most accurately: Rose Color Meanings - FTD.com.  --- Our "identify the rose color meaning" challenge turned out to be a huge hit for Valentine's Day and helped students give the appropriately colored roses to parents, classmates, and teachers.

* * * * * * * * * * * * * * * * * * * * *
Well, creative friends, I hope this blog entry was helpful and inspired some ideas for incorporating dot to dot pages into your Makerspace classes.  May the worksheets found on this fantastic, free-to-print site really CONNECT with your students! 😁


Next blog I'd be writing about: Connect-the-Dots for Kindergarten Kids!

(Images collected for the collages, plus the gifs and basic worksheet samples used for this blog entry were all found online.)

* * * * * * * * * * * * * * * * * * * * *

Visit CONNECT THE DOTS 101 by clicking the link: Connect The Dots 101

Also, I'd love for us to keep in touch!  So, I invite you to my main online platforms:

Please "Follow" and share my Makerspace blog, here on Blogger @
The Makerspace Guy.

You can also connect with me through social media:


Twitter: @makerspaceguy 

Instagram: makerspaceguy

Pinterest: @makerspaceguy

NOTE: Simply click on the orange links to get to each site.


#Makerspace #MakerspaceGuy #TheMakerSpaceGuy #STEM #STEMeducation #STEAM #STEAMeducation #art #crafts #ArtsAndCrafts #CraftsForKids #EasyCraftsForKids #MakerspaceOnABudget #ElementarySchool #TipsForTeachers #TeachingTips #ClassroomTips

#ConnectTheDots #InternationalDotDay #DotDay

Saturday, July 3, 2021

Page 8 - My Top 5 Makerspace Ideas of the Week (June 27 - July 3)


Greetings, it's me, Alberto, but you can call me the Makerspace Guy!

Summer is here and it's grilling time!  We all know you need a fire burning in your barbeque grill to cook steaks, hamburgers, or hotdogs.   Every fire starts with a spark.


Sometimes reading about a little idea will ignite an even bigger idea to cook up somethin' mighty good! 👍

For this post, I've decided to share five favorite, easy-to-make ideas inspired by my students.  Each month of May, before summer break, I collect a list of "Bright Ideas" from my kindergarten through 5th-grade kids.  These are special challenges based on projects they come up with on their own and create in Makerspace.  When school lets out, the entire list is emailed to all the school families, so they may try the challenges themselves over the break.  ---  Your kids can easily create these at home too or in class.


Notice, I have not included step-by-step instructions.  As previously mentioned, often I simply share a project idea or photo of the item with my students, which encourages them to use their imaginations and figure out how to build their version of the creation!  

You see, our Makerspace station-time is like free-play.  Over the years, many of my Maker Kids have commented how much they enjoy the freedom to create whatever they want, in their own way.  I find that it really opens the door to exploration and creativity!

From this year's "Bright Idea" list, please allow me to present my...

for the week of June 27 - July 3, 2021


5.) Make a fun, moving taco puppet.  ---  NOTE: You don't have to wait till Tuesday to make this taco! 😁


4.) Using cardboard, build a model of a robot.  Challenge yourself to include one moving part,... or more!


3.) Create an exciting, original board game with a time travel theme!


2.) Construct a cool Bug Bed and Breakfast for real-life bugs!  (Or plastic toy bugs ones if parents freak out!)  ---  Remember, guests don't stay long at a B & B, so make sure those cute little insects get released after a short stay.


1.) Build a working birdfeeder or birdhouse for those fine feathered friends fluttering outside your home!


* * * * * * * * * * * * * * * * * * * * *
Well, friends, I hope you've been inspired by this week's TOP 5.  As I remind my students, remember to take these little idea-sparks and make them bigger, better, and uniquely your own!


I can't wait to see what ignites my interest to include as part of next week's list!

Please feel free to leave any questions or suggestions in the comment section.


---  Stay creative, The Makerspace Guy


(Pictures collected for the collages, as well as the gif and photos used for this blog entry were all found online.) 

* * * * * * * * * * * * * * * * * * * * *

To read the previous TOP 5 list click on the link:


I'd love for us to keep in touch!  So, I invite you to my main online platforms:

Please "Follow" and share my Makerspace blog, here on Blogger @
The Makerspace Guy.

You can also connect with me through social media:


Twitter: @makerspaceguy 

Instagram: @makerspaceguy

Pinterest: @makerspaceguy

NOTE: Simply click on the orange links to get to each site.


#Makerspace #MakerspaceGuy #TheMakerSpaceGuy #STEM #STEMeducation #STEAM #STEAMeducation #art #crafts #ArtsAndCrafts #CraftsForKids #EasyCraftsForKids #MakerspaceOnABudget #ElementarySchool #TipsForTeachers #TeachingTips #ClassroomTips #Top5

Thursday, July 1, 2021

Page 7 - Makerspace Miniature Golf


Greetings, it's me, Alberto, but you can call me the Makerspace Guy!

Every school day, my students get to create at various workstations, which happen simultaneously in my classroom.  Our newest station is Miniature Golf, where students use their Maker skills to build small golf courses out of cardboard.

There's an important difference between miniature golf and putt-putt golf.

Explained in easy terms,

"Putt-putt courses usually have no overriding theme. Holes are very bare besides the obstacles guarding the hole. Many mini-golf courses have themes or are more complex in their hole structure (putting down hills, through a cave, under a waterfall, etc.)."

---  Matthew Marcon, PENINSULA PULSE
(Click on the link to read the brief article: Mini-Golf vs. Putt-Putt .)


If your students are like mine, they love constructing obstacle courses.  Therefore we play miniature golf rather than putt-putt in our classroom.  (Yes, indoors!)  The kids also enjoy building houses, bridges, windmills, and other structures as part of their projects.

Due to time limitations, students are not required to create the entire standard 9 hole course.  Just a structure with 1 or 2 holes is sufficient.  ---  Also, we relax the official game rules quite a bit.

Here are some helpful tips, hacks, and bright ideas to start a TEE-rific miniature golf station in your own classroom 😁:


WHAT YOU'LL NEED


1.)  FLOOR SPACE


I have the kids build their courses on the floor to keep the classroom tables available for other stations.  When completed, the students set up their projects in the designated area in front of the room for our "Show & Tell"-type Makerspace Showcase, which takes place at the end of every class period.


2.) BUILDING TOOLS

Scissors, pencils, markers, rulers, tape, glue, etc.


3.) CARDBOARD

To read how we collect cardboard for our classes, along with the types of board we request, click on the link to read my previous blog entry: Collect Cardboard with Your Own Makerspace Donation Box.


4.) CONSTRUCTION PAPER
Make sure you provide various colors and sizes.  ---  BTW, stock up on green paper.  Lots and lots of green paper to represent the artificially turfed fairways.


5.) EXTRAS


Among the special items that have been requested by my students for their mini-golf courses:  foil, pipe cleaners, yarn, disposable cups, paper plates, straws, cotton balls for snow, and bulletin board paper.  ---  Usually green bulletin board paper.


6.) TOY GOLF CLUBS

***There are some very important details of which you should be aware.***

Available at DollarTree.com

I was excited when I found inexpensive toy golf sets at my local DOLLAR TREE discount variety store.  They were located in the seasonal Spring/Summer section, so I didn't hesitate to snatch them up.

I bought 6 sets at DOLLAR TREE, each merely costing,... hum, uh, hum,... oh yeah, $1.00! 😁

Every set comes with...
  • 1 disposable net bag
  • 1 plastic putter
  • 1 tee
  • 1 putting cup
  • 1 plastic flag
  • 3 light-weight plastic balls (in 3 different colors!)
NOTE:  Children will crush the plastic golf balls, by accident or on purpose.  (Be prepared for the heartbreak.  Yours.)  I've found no way to repair the balls, but I'm looking for replacements.  Fortunately, each set comes with 3.

To order a case of 24 golf sets, visit the Dollar Tree website.  Simply click on the link: 24 Children's Plastic Golf Play Sets.


HELPFUL TIPS

Friends, save yourself some time and frustration by learning from my mistakes.

TIPS FOR BUYING

  • Notice details before you buy.  Other toy golf sets I've seen come with 3 different types of clubs, but sadly only 1 putter.  You need putters.
  • Don't purchase the set if the included golf balls are too small.
  • Look for sets that offer different color clubs and balls, so students can easily identify which is theirs.  This cuts down on confusion as to which ball belongs to each student.
  • Remember, most brick-and-mortar stores only sell the toy golf sets during the spring and summer retail seasons.

TIPS FOR CLASSROOM
  • I permanently store away all the plastic putting cups and flags.  They're not necessary.  Let the kids create their own.
  • Encourage students to work in teams of no more than 2.
  • Only 4 toy clubs are issued at a time for each class period, due to the size of our room.
  • Warn students that if their balls fly across the room (like baseballs) their clubs and balls get taken away.
  • Limit the number of weeks you offer this station.  Although making miniature golf courses is a fantastic project, kids will lose interest after a while.  Also, it frees up the floor for yet another cool station idea.

HACKS
Even MacGyver would approve.
  • Have your students create their own golf clubs out of cardboard.  They can use foil to fashion a ball.  ---  NOTE: I was originally inspired to start a miniature golf station by a student who made his own clubs and course.
  • All out of cardboard?  Use heavy cardstock paper or poster board instead!
  • Make smaller tabletop versions to save time, material, and space!

BRIGHT IDEAS
  • Create a hybrid game, with half miniature golf/ half another sport.  Example: half golf/ half bowling!
  • Build a course where each section features logos of different sports teams from your state!
  • Design a course with a fast-food restaurant theme.  (You know, something you'd love to see at McDonald's someday.)
  • Make exciting ramps!  One daredevil kid made the ball jump his ascending ramp, fly through a pretend ring of fire, land onto a descending ramp, and drop into the hole.  ---  The whole class cheered wildly for him!

* * * * * * * * * * * * * * * * * * * * *
Well, creative friends, I hope this entry has inspired you to try creating miniature golf courses with your students.  I'm certain your kids will have fun!

Out of all our Makerspace projects for the 2020 - 2021 school year, this was the most favorite among my students,... by PAR. 😁


(Pictures collected for the collages, plus the gifs and the photos used for this blog entry were all found online.) 

* * * * * * * * * * * * * * * * * * * * *

I'd love for us to keep in touch!  So, I invite you to my main online platforms:

Please "Follow" and share my Makerspace blog, here on Blogger @
The Makerspace Guy.

You can also connect with me through social media:


Twitter: @makerspaceguy 

Instagram: makerspaceguy

Pinterest: @makerspaceguy

NOTE: Simply click on the orange links to get to each site.


#Makerspace #MakerspaceGuy #TheMakerSpaceGuy #STEM #STEMeducation #STEAM #STEAMeducation #art #crafts #ArtsAndCrafts #CraftsForKids #EasyCraftsForKids #MakerspaceOnABudget #ElementarySchool #TipsForTeachers #TeachingTips #ClassroomTips

#MiniatureGolf #MiniGolf #PuttPuttGolf #ToyGolfSets

Tuesday, June 29, 2021

Page 6 - Collect Cardboard with Your Own Makerspace Donation Box


Greetings, it's me, Alberto, but you can call me the Makerspace Guy!

When I started Makerspace at my current school, a very bright and creative 5th-grade student would often ask me, "Do you have any cardboard?"


You see, she had special projects she wanted to create.  However, they usually involved using cardboard.  Back then, I did not make it a habit to keep it in stock.

Not wanting to squelch her creative spirit, I'd go hunting through my desk for legal pads and spiral notebooks, then cut the backs off.  When I ran out of tablets, I started emptying paper clip boxes, crayon boxes, empty paper towel tubes,...  why, I'd scrounged the room for any and all kinds of board I could find!


The young girl's creations were always impressive, and eventually gave me an idea, "We need to start collecting cardboard boxes and tubes for every student!" 💡

Well, the thought of having to save hundreds, upon hundreds of cardboard items every week seems quite daunting.  However, over time, I was able to find clever ways to collect and store it all.

Here are some "kid-tested/Makerspace Guy approved" helpful tips, hacks, and bright ideas to start collecting cardboard with your own Makerspace donation box:


GET THE WORD OUT

  • Make announcements to all of your classes about collecting cardboard, especially to the youngest ones.  ---  It's been my experience that younger students tend to donate more often than those in older grades.
  • Encourage students to ask family members from outside their households to save as well.  ---  We actually had a little girl whose grandma would ship her cardboard donations all the way from Arizona to Texas to help us out!
  • Put out the call for donations on your school's Facebook page or other social media sites.  It's a free way to get the word out,... and we teachers love free! 💓

BE SPECIFIC ABOUT YOUR NEEDS


As a rule, I tell my students and parents to only donate lightweight cardboard. In other words, cardboard that can be cut using "kindergarten scissors".  Example: boxes for cereal, cookies, granola bars, toothpaste, soda cans, etc.  ---  I throw away all boxes with odors from laundry detergent, dryer sheets, or garlic toast, since some kids may have sensitivities to strong smells.  Besides, they stink up the classroom.  Pee-YOO! 😫


Thin boxes are easy to cut and simple to fold, therefore they are perfect for Makers in kindergarten through 5th grade.  Although, you may need to help younger kids cut holes in their cardboard.

BTW, any donations of thick, heavy packing boxes I give to the GT class, where they use more industrial tools to cut and build.


SET THE DONATION BOX IN A GOOD LOCATION

Actual photo of our donation box in the hall.

  • Place your Makerspace Donation Box out in the school's main hallway (with the principal's permission of course).  Make sure it's in an easy-to-find spot, so students and staff can drop off their donations anytime during the school day.
  • You'll want the box away from your classroom, so excited donors won't constantly interrupt your classes with news of their cardboard contributions.

HACKS & BRIGHT IDEAS
A.)  Don't have storage bins for all your extra cardboard? Store it in discarded copy paper boxes with lids.  They're usually easy to find on campus.


B.)  Consider sorting cardboard in different storage boxes:
  • 1 just for cereal boxes (a popular requested size)
  • 1 or 2 for various size boxes
  • 1 for toilet paper tubes
  • 1 for paper towel tubes

C.) Teach your students to break down their boxes before donating.  I've noticed that ripped boxes are often left unused, so demonstrate how to keep them intact and carefully flattened.  This will also help fit more cardboard into the donation bin, plus allows for easier storage.  


D.)  Never, ever put out all the cardboard at once.  ---  Most kids are like locusts to wheat when it comes to cardboard.  They consume, consume, consume!


E.)  If you run out of cardboard encourage students to use cardstock paper as a substitute.

F.)  Store your extra bins in other rooms.  ---  I am very fortunate to have a large storage closet available to me in the school library.  It's a great place to hold the extra cardboard, as well as all the Makerspace equipment we are not currently using.


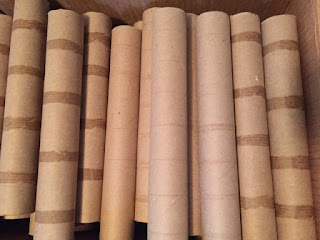
TOILET PAPER TUBES


Kids love using these for their projects!  ---  Though not my preference, we do accept toilet paper tube donations.


PAPER TOWEL TUBES


They are like gold and run out quickly!  I recommend you always have a secret stash saved away.


ODD SHAPE TUBES


Thick and odd shapes tubes can be saved for times when there is a shortage of regular tubes, or if someone needs a stronger one.


* * * * * * * * * * * * * * * * * * * * *

Well, creative friends, I hope I've offered you some helpful advice, and have taken away some concerns you may have about including cardboard in your class projects.

Speaking from years of experience, the benefits of having cardboard available for students to create, far outweigh the efforts of collecting and storing it.  ---  Also, it'll help keep all your legal pads and tablets looking nice.


(Most of the pictures collected for the collages, as well as the photos used for this blog entry were all found online.)

* * * * * * * * * * * * * * * * * * * * *

I'd love for us to keep in touch!  So, I invite you to my main online platforms:

Please "Follow" and share my Makerspace blog, here on Blogger @
The Makerspace Guy.

You can also connect with me through social media:


Twitter: @makerspaceguy 

Instagram: makerspaceguy

Pinterest: @makerspaceguy

NOTE: Simply click on the orange links to get to each site.


#Makerspace #MakerspaceGuy #TheMakerSpaceGuy #STEM #STEMeducation #STEAM #STEAMeducation #art #crafts #ArtsAndCrafts #CraftsForKids #EasyCraftsForKids #MakerspaceOnABudget #ElementarySchool #TipsForTeachers #TeachingTips #ClassroomTips

#cardboardboxes #cardboadtubes #cardboardcrafts

Page 9 - My Favorite Connect-the-Dots Site!

Greetings, it's me, Alberto, but you can call me the Makerspace Guy! CONNECT-THE-DOTS (also known as "Dot to Dot" or "Joi...