Tuesday, June 29, 2021

Page 6 - Collect Cardboard with Your Own Makerspace Donation Box


Greetings, it's me, Alberto, but you can call me the Makerspace Guy!

When I started Makerspace at my current school, a very bright and creative 5th-grade student would often ask me, "Do you have any cardboard?"


You see, she had special projects she wanted to create.  However, they usually involved using cardboard.  Back then, I did not make it a habit to keep it in stock.

Not wanting to squelch her creative spirit, I'd go hunting through my desk for legal pads and spiral notebooks, then cut the backs off.  When I ran out of tablets, I started emptying paper clip boxes, crayon boxes, empty paper towel tubes,...  why, I'd scrounged the room for any and all kinds of board I could find!


The young girl's creations were always impressive, and eventually gave me an idea, "We need to start collecting cardboard boxes and tubes for every student!" ๐Ÿ’ก

Well, the thought of having to save hundreds, upon hundreds of cardboard items every week seems quite daunting.  However, over time, I was able to find clever ways to collect and store it all.

Here are some "kid-tested/Makerspace Guy approved" helpful tips, hacks, and bright ideas to start collecting cardboard with your own Makerspace donation box:


GET THE WORD OUT

  • Make announcements to all of your classes about collecting cardboard, especially to the youngest ones.  ---  It's been my experience that younger students tend to donate more often than those in older grades.
  • Encourage students to ask family members from outside their households to save as well.  ---  We actually had a little girl whose grandma would ship her cardboard donations all the way from Arizona to Texas to help us out!
  • Put out the call for donations on your school's Facebook page or other social media sites.  It's a free way to get the word out,... and we teachers love free! ๐Ÿ’“

BE SPECIFIC ABOUT YOUR NEEDS


As a rule, I tell my students and parents to only donate lightweight cardboard. In other words, cardboard that can be cut using "kindergarten scissors".  Example: boxes for cereal, cookies, granola bars, toothpaste, soda cans, etc.  ---  I throw away all boxes with odors from laundry detergent, dryer sheets, or garlic toast, since some kids may have sensitivities to strong smells.  Besides, they stink up the classroom.  Pee-YOO! ๐Ÿ˜ซ


Thin boxes are easy to cut and simple to fold, therefore they are perfect for Makers in kindergarten through 5th grade.  Although, you may need to help younger kids cut holes in their cardboard.

BTW, any donations of thick, heavy packing boxes I give to the GT class, where they use more industrial tools to cut and build.


SET THE DONATION BOX IN A GOOD LOCATION

Actual photo of our donation box in the hall.

  • Place your Makerspace Donation Box out in the school's main hallway (with the principal's permission of course).  Make sure it's in an easy-to-find spot, so students and staff can drop off their donations anytime during the school day.
  • You'll want the box away from your classroom, so excited donors won't constantly interrupt your classes with news of their cardboard contributions.

HACKS & BRIGHT IDEAS
A.)  Don't have storage bins for all your extra cardboard? Store it in discarded copy paper boxes with lids.  They're usually easy to find on campus.


B.)  Consider sorting cardboard in different storage boxes:
  • 1 just for cereal boxes (a popular requested size)
  • 1 or 2 for various size boxes
  • 1 for toilet paper tubes
  • 1 for paper towel tubes

C.) Teach your students to break down their boxes before donating.  I've noticed that ripped boxes are often left unused, so demonstrate how to keep them intact and carefully flattened.  This will also help fit more cardboard into the donation bin, plus allows for easier storage.  


D.)  Never, ever put out all the cardboard at once.  ---  Most kids are like locusts to wheat when it comes to cardboard.  They consume, consume, consume!


E.)  If you run out of cardboard encourage students to use cardstock paper as a substitute.

F.)  Store your extra bins in other rooms.  ---  I am very fortunate to have a large storage closet available to me in the school library.  It's a great place to hold the extra cardboard, as well as all the Makerspace equipment we are not currently using.


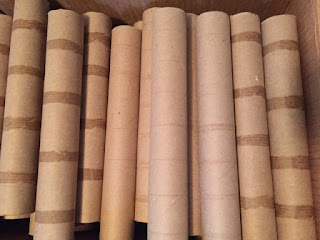
TOILET PAPER TUBES


Kids love using these for their projects!  ---  Though not my preference, we do accept toilet paper tube donations.


PAPER TOWEL TUBES


They are like gold and run out quickly!  I recommend you always have a secret stash saved away.


ODD SHAPE TUBES


Thick and odd shapes tubes can be saved for times when there is a shortage of regular tubes, or if someone needs a stronger one.


* * * * * * * * * * * * * * * * * * * * *

Well, creative friends, I hope I've offered you some helpful advice, and have taken away some concerns you may have about including cardboard in your class projects.

Speaking from years of experience, the benefits of having cardboard available for students to create, far outweigh the efforts of collecting and storing it.  ---  Also, it'll help keep all your legal pads and tablets looking nice.


(Most of the pictures collected for the collages, as well as the photos used for this blog entry were all found online.)

* * * * * * * * * * * * * * * * * * * * *

I'd love for us to keep in touch!  So, I invite you to my main online platforms:

Please "Follow" and share my Makerspace blog, here on Blogger @
The Makerspace Guy.

You can also connect with me through social media:


Twitter: @makerspaceguy 

Instagram: makerspaceguy

Pinterest: @makerspaceguy

NOTE: Simply click on the orange links to get to each site.


#Makerspace #MakerspaceGuy #TheMakerSpaceGuy #STEM #STEMeducation #STEAM #STEAMeducation #art #crafts #ArtsAndCrafts #CraftsForKids #EasyCraftsForKids #MakerspaceOnABudget #ElementarySchool #TipsForTeachers #TeachingTips #ClassroomTips

#cardboardboxes #cardboadtubes #cardboardcrafts

Saturday, June 26, 2021

Page 5 - My Top 5 Makerspace Ideas of the Week (June 20-26)


Greetings, it's me, Alberto, but you can call me the Makerspace Guy!

When I was a kid, I heard a beautiful children's song in church entitled PASS IT ON.  The lyrics began with, 

"It only takes a spark to get a fire going. ๐Ÿ”ฅ"


Well, every week I come across several bright ideas that spark brilliant future lesson plans!  Some ideas I find online, others in books, but most are inspired by something as simple as a song, TV commercial, or a work of art hanging in a museum.


For this post, I've decided to share five favorite, easy-to-make ideas I came across this week.  However, notice I have not included step-by-step instructions.  ("What, no instructions!?  What a predicament!" ๐Ÿ˜ฑ)  Often I simply share a project idea or photo of the item with my students, then encourage them to use their imaginations and figure out how to build their version of the creation!  

You see, our Makerspace Station time is like free-play.  Over the years, many of my Maker Kids have commented how much they enjoy the freedom to create whatever they want, in their own way.  I find that it really opens the door to exploration and creativity!


So now, please allow me to present my...


for the week of June 20 - 26, 2021


5.) Make a momma or daddy origami dog.  Then, use a smaller paper square to create a puppy!


4.) Using cardboard, build a model of a dog house for a stuffed toy doggie, origami dog, or even a real-life pet pooch!


3.) Construct puppets that resemble underwater creatures!  They can be stick puppets, marionettes, hand puppets, finger puppets, or even eerie shadow puppets!


2.) Using items found around your room, fashion together a working spinner, then time it with a stopwatch.  (Online stopwatches work just as well.)  ---  Want to make it a competition?  Invite others to join you in making spinners and see who spins their structure the longest!


1.) Create something cool out of materials that were going to be thrown away.  ---  NOTE: Be certain the items are clean and free of hazardous chemicals.


* * * * * * * * * * * * * * * * * * * * *

Well, friends, I hope you've been inspired by this week's TOP 5.  I can't wait to see what inspires me in the coming week and prompts me to PASS IT ON to you via next week's list!

Please feel free to leave any questions or suggestions in the comment section.


---  Stay creative, The Makerspace Guy


(Pictures collected for the collages, as well as the gif and photos used for this blog entry were all found online.) 

* * * * * * * * * * * * * * * * * * * * *


I'd love for us to keep in touch!  So, I invite you to my main online platforms:

Please "Follow" and share my Makerspace blog, here on Blogger @
The Makerspace Guy.

You can also connect with me through social media:


Twitter: @makerspaceguy 

Instagram: makerspaceguy

Pinterest: @makerspaceguy

NOTE: Simply click on the orange links to get to each site.


#Makerspace #MakerspaceGuy #TheMakerSpaceGuy #STEM #STEMeducation #STEAM #STEAMeducation #art #crafts #ArtsAndCrafts #CraftsForKids #EasyCraftsForKids #MakerspaceOnABudget #ElementarySchool #TipsForTeachers #TeachingTips #ClassroomTips #Top5

Thursday, June 24, 2021

Page 4 - Motivate to Create, Using Posters!


Greetings, it's me, Alberto, but you can call me The Makerspace Guy!

Do the walls of your classroom inspire and motivate your students to create?  Or do they look similar to the walls of a solitary confinement cell?

My current room is located behind the school in a portable building.  Upon joining the staff, the principal gave me a walk-through of my future classroom.  When I entered I cringed, because my first thought was, "This looks like a dingy bar!"


No way, no how, was it a space conducive to any kind of creativity!  The room needed a total makeover!  ---  NOTE:  More on the attack plan I used will be shared in a future blog entry.


In addition to artwork, it's my opinion that colorful, motivational posters are essential for elementary school Makerspace areas.  On countless occasions, I've had kids come up and show me a project they created that was inspired by a sign they saw hanging on the Makerspace wall.  Or they'll quote a motivational poster out loud to another student to offer encouragement.

Keeping the posters topical rather than thematic will even work for students with sensory issues.  (For example displaying posters that reflect the topic of Makerspace, rather than the theme of "Kitty Cats" just because you like kitty cats.)


By the way, I purchase and own most of my classroom posters, so I can hang on to them, in case I move to a new school or town.  (Speaking from experience, starting from scratch isn't always fun.๐Ÿ‘Ž)


Now, here is my all-time favorite motivational poster.  "TA-DA!"


PRODUCT INFORMATION:
Measurements: 13 3/8" wide x 19" high
Brand:  Creative Teaching Press
GTIN:  00030554072888

The price range, as of this post, is about $3.39 - $10.16 online, depending on the vendor.  Shipping is usually separate.


TEACHING TIP:


Just because the poster is hanging on the wall doesn't mean children will understand the meaning.  Motivational posters make more of an impact on your students if you explain what they mean.


PRACTICAL TIP:


"Save the staples, save the wall!"

I love using Poster Putty (a.k.a. Mounting Putty, Adhesive Putty, Tac 'N Stick), but since I teach inside a portable in Texas, the weather right outside the walls often causes my posters to fall down if I use putty alone.

Adding a staple or two to the top of each sign was a quick fix, but left holes in my posters and the wall.  However, recently I started fastening binder clips to the top of each poster.  I then hang the binder ring on the wall with a pushpin, and lastly secure the edges of the decoration with Mounting Putty.

Adjusting posters is now so much easier too!

Also, I try to hang new posters in the same spot as old ones, so there won't be pushpin holes all over the walls.


MONEY-SAVING HACKS:


  • Create posters!  Search online for motivational slogans which apply to your class.  Then hand out poster boards to your students and have them draw signs of the slogan while including their original artwork!   ---  NOTE: I hardly ever give out full-sized 22" x 28" poster boards.  Instead, I cut the boards in half by using the giant guillotine-style cutter in the teachers' workroom.  This not only saves money, but since my classes are only 50 minutes in length, it makes it easier for the kids to fill up the blank space of their posters.  
  • Use white poster boards.  They're cheaper than color and they don't fade as easily.  Also, the artwork shows up better on white.
  • Have your students come up with their own original motivational slogans and images!
  • Laminate your posters to give them longer life!  Make sure there's enough laminating film in the machine before you put each sign through the process, so they won't get ruined.


BRIGHT IDEAS:


  • Plan a lesson or unit around the poster's message.  Example: Ask your students to come up with 5 items located in the classroom which they can use to draw a picture.  Take samples of those items (pencil, crayon, marker, color pencil, chalk) and place them in a box.  Preferably a clear box.  Now give the kids 10 minutes to create a quick and simple picture of a flower WITHOUT using items like those in the box.  Explain that they can use various items found in the room.  Afterward, have a discussion about the true meaning of "Think Outside the Box."
  • Ask your students to come up with examples of famous creative people who thought "outside the box", or maybe share about a time they themselves had a different approach to something.
  • Take a picture of the poster, or find the exact image online, and include it in your PowerPoint or Google Slides class presentations.


Well, friends, I hope this blog entry has given you all some helpful and exciting ideas to try in your own classrooms.  Please feel free to leave any questions or suggestions in the comment section.


---  Stay creative, The Makerspace Guy


(Pictures collected for the collages, as well as the photos used for this blog entry were all found online.) 

* * * * * * * * * * * * * * * * * * * * *

I'd love for us to keep in touch!  So, I invite you to my main online platforms:

Please "Follow" and share my Makerspace blog, located here on Blogger @
The Makerspace Guy.

You can also connect with me through social media:


Twitter: @makerspaceguy 

Instagram: makerspaceguy

Pinterest: @makerspaceguy

NOTE: Simply click on the orange links to get to each site.


#Makerspace #MakerspaceGuy #TheMakerSpaceGuy #STEM #STEMeducation #STEAM #STEAMeducation #art #crafts #ArtsAndCrafts #CraftsForKids #EasyCraftsForKids #MakerspaceOnABudget #ElementarySchool #TipsForTeachers #TeachingTips #ClassroomTips

#ClassroomDecorations #ClassroomPosters #classroomdecor #classroomsetup #MotivationalPosters #Motivation #Inspire

Tuesday, June 22, 2021

Page 3 - No Origami Paper? Oh No, What a Predicament!


Greetings, it's me, Alberto, but you can call me the Makerspace Guy!

In my last post, I wrote about introducing origami to your students.  You can check out that blog entry by simply clicking on the orange link: Easy Origami for Kids (K-5th).


Once they learn about origami, many children want to create projects at home.  In order to learn more, they check out origami instruction books from the library, buy their own manuals at Book Fairs, and view popular YouTube instructional videos.  However, most households don't stock store-bought origami paper or have fancy paper cutters to make the needed paper squares.


"No origami paper?  Oh no, what a predicament!"


So with the help of my talented hubby, we produced a special video tutorial to help my students.  To make it more entertaining for the kiddos, I decided it should star my little "nephew" Gregbert, who is of elementary school age and happens to be extremely creative. ๐Ÿ˜‰


Press the YouTube play button to view:


Wow, that Cha-cha is one talented dog!

Here are some other helpful tips, hacks, and bright ideas...

TEACHING TIP:


Most origami projects start with a square. So, remind students that a square has 4 equal sides.  ---  Many kids who cut their own origami paper come to me frustrated because their creations turn out crooked.  The main culprit is usually starting with uneven squares.


PRACTICAL TIP:


Make available several clear plastic rulers, scissors, pencils with erasers, plus various square shapes, to help your students cut their own origami paper.  ---  Square tissue boxes are a perfect pattern-making size!


MONEY-SAVING HACK:

  • Encourage families to donate their unused wrapping paper after birthdays or holidays so kids can make colorful squares!
  • For those folks who subscribe to the newspaper, ask them to donate the Sunday Comics sections.  However, I wouldn't ask for the entire newspaper, since some of the stories can be distressing for children.  ---  SIDE NOTE: To my surprise, many of my students have never read comics from a newspaper!
  • If a child uses just a bit of construction paper for a craft project, suggest taking the leftovers and cutting paper squares for origami.


BRIGHT IDEAS:


  • Make special event or holiday-themed origami projects with sheets of wrapping paper.  ---  Most of these structures will need some sort of adhesive since the sheets will naturally want to roll back up.
  • Have several types of tape handy for the many types of paper.  ---  Glossy wrapping holds better with glossy tape.
  • Add some yard or pipe cleaners to origami projects and create holiday ornaments or gift tags!


Well, friends, I hope this blog entry has given you all some helpful hints and exciting ideas to try in your own classrooms and homes.  Please feel free to leave any questions or suggestions in the comment section.


---  Stay creative, The Makerspace Guy


(Pictures collected for the collages and the photos used for this blog entry were all found online.) 

* * * * * * * * * * * * * * * * * * * * *

I'd love for us to keep in touch!  So, I invite you to my main online platforms:

Please "Follow" and share my Makerspace blog, here on Blogger @
The Makerspace Guy.

You can also connect with me through social media:


Twitter: @makerspaceguy 

Instagram: makerspaceguy

Pinterest: @makerspaceguy

NOTE: Simply click on the orange links to get to each site.


#Makerspace #MakerspaceGuy #TheMakerspaceGuy #STEM #STEMeducation #STEAM #STEAMeducation #art #crafts #ArtsAndCrafts #CraftsForKids #EasyCraftsForKids #MakerspaceOnABudget #ElementarySchool #TipsForTeachers #TeachingTips #ClassroomTips 

#origami #OrigamiForKids #EasyOrigami #EasyOrigamiForKids

Monday, June 21, 2021

Page 2 - Easy Origami for Kids (K-5th)


Greetings, it's me, Alberto, but you can call me the Makerspace Guy!

In my classroom, students are invited to visit various creative stations.  A popular destination is the Origami Station, where kids follow instructions to create structures out of paper.


ori·​ga·​mi | \ หŒศฏr-ษ™-หˆgรค-mฤ“  \ -  the Japanese art or process of folding squares of paper into representational shapes.
(Merriam-Webster Online Dictionary)


Instructing kids to make origami can seem rather overwhelming, especially when teaching kinder kids who are just starting school.


I've purchased many "How-To-Make" origami books and checked out several from the school library, but the number one book I recommend is EASY ORIGAMI by John Montroll.  He's my favorite author of origami instructional books. 

This step-by-step manual comes with easy-to-follow instructions and photos.

It works well for kindergarten through 5th-grade students.


TEACHING TIP:

On Day 1 of introducing origami to your students, start with the dog pattern for all grades.  It's the easiest pattern to follow and the simplest project to create.  On Day 2, introduce the cat.  Kids love dogs and cats!  As we know, children tend to enjoy creating things they like.  ---  Therefore, you may want to avoid teaching your students to make origami Brussel sprouts. ๐Ÿ˜Š

If your students are struggling, remind them to look at the next step for help!  See what your project should look like when you complete the current step.


PRACTICAL TIP:


Before you present your students with a pattern, you better practice making the origami structure yourself at least a couple of times.  ---  I learned the hard way to never introduce a pattern I cannot complete myself.  You'll always have students that have questions or need help.


MONEY-SAVING HACK:


Origami paper is super expensive, especially if you are buying paper for the entire student body.  Since most patterns require square paper, we cut our own.  

To cut your squares, simply use plain white, regular weight copy paper (8 1/2" x 11") and cut it into squares (5 1/2" x 5 1/2") with a paper cutter.  2 squares can be made out of 1 copy paper sheet.

Guillotine-style cutters make me nervous in the classroom, so I use a rotary cutter with a rolling disk that slides back and forth.  ---  Ask for parent volunteers or dependable older students to help make hundreds of squares.

Yes, cutting your own squares is time-consuming, however, it saves quite a lot of money.


BRIGHT IDEAS:

  • Invite your students to draw cute faces on the origami animals.
  • Tape popsicle sticks (a.k.a. craft sticks) to the back of the structures and transform them into stick puppets!
  • Create a greeting card and glue an origami animal to the front, or hide the origami structure in a pocket you build inside the card for a fun gift.


* * * * * * * * * * * * * * * * * * * * *
If you're ready to purchase materials for your Origami Station, I recommend the following "Kid Tested, Makerspace Guy Approved" items.


TRIED & TRUE BRANDS:


INSTRUCTION BOOK
For purchase information, visit the DOVER PUBLICATIONS website: EASY ORIGAMI - Dover Publications or buy it on AmazonEASY ORIGAMI -Amazon.

NOTE:  My Origami Station usually is just a table that seats 4 students at a time.  I prefer to let no more than 2 students share a book, however, one book per child would be ideal.


ORIGAMI PAPER
DOURA Origami Paper - 750 Sheets Economy Pack

Easy to fold 6" square sheets, 25 beautiful vivid colors, plus the package doubles as a convenient storage box.

Prices vary widely, so make sure to shop around for a bargain.  For purchase info visit AmazonDoura Origami Paper - 750 Count.

NOTE: I keep our box of colored origami paper at my desk to avoid running out so quickly.  Students may come to me for colored square sheets, but first, they must show me their first draft, created using the plain white paper squares.


* * * * * * * * * * * * * * * * * * * * *

Well, my creative friends, I hope this blog entry is useful to you and helps take away the scariness of introducing origami into your classes.

Please feel free to leave any questions or suggestions in the comment section.


Stay creative,
The Makerspace Guy


(Pictures collected for the collages and the photos used for this blog entry were all found online.) 

* * * * * * * * * * * * * * * * * * * * *

I'd love for us to keep in touch!  So, I invite you to my main online platforms:

Please "Follow" and share my Makerspace blog, here on Blogger @
The Makerspace Guy.

You can also connect with me through social media:


Twitter: @makerspaceguy 

Instagram: makerspaceguy

Pinterest: @makerspaceguy


NOTE: Simply click on the orange links to get to each site.


#Makerspace #MakerspaceGuy #TheMakerspaceGuy #STEM #STEMeducation #STEAM #STEAMeducation #art #crafts #ArtsAndCrafts #CraftsForKids #EasyCraftsForKids #MakerspaceOnABudget #ElementarySchool #TipsForTeachers #TeachingTips #ClassroomTips 

#origami #OrigamiForKids #EasyOrigami #EasyOrigamiForKids #JohnMontroll

Page 9 - My Favorite Connect-the-Dots Site!

Greetings, it's me, Alberto, but you can call me the Makerspace Guy! CONNECT-THE-DOTS (also known as "Dot to Dot" or "Joi...